Turquoise Energy Ltd. News #48
Victoria BC
Copyright 2012 Craig Carmichael - February 1st 2012


http://www.TurquoiseEnergy.com = http://www.ElectricHubcap.com = http://www.ElectricWeel.com

Month In Brief (Summaries)

Electric Hubcap System - No report (still no circuit boards for the motor controller!)

Magnetic Impulse Torque Converter Project

* Version 2 tests
* Modified operating principle: magnetic impulse + mechanical hammer generates short pulses of high torque
* Version 3 construction

Electric Weel Motor - no report
Sprint Car Conversion Project - no report (see Torque Converter project)

LED Lighting Project

* 1100 lumen cold white heatsink drill template; CNC machine setup/mods/two drills idea
* No word from Energy Star (E-mailing now)

DSSC Solar Cell Project - Potential Revival
* Found iodine electrolyte to enable DSSC cells.
* Applied as a 'pebbly' skin on cover glass, my nanocrystalline titanium dioxide borosilicate glass mix appears to offer ~30-45% daily energy performance gain over smooth, flat glass, for any solar cells!
* Good gains on cloudy days!
* Commercial panel proves unsuitable for experiments. (Back to DSSC)

NiMH Battery Project - No report

Turquoise Battery Project
* Pourbaix Diagrams: better electrochemical info
*
Ni-Mn battery experiments
* Salty cell pH 12.3 with calcium hydroxide
* Alkaline Ni-Mn takes KOH pH from 14 to 13 via permanganate ion.
* Pourbaix diagrams show that pH 12-13 has better chemistries than either 7 or 14 for ALL the active elements under consideration. (Including it apparently eliminates zincate ion, making zinc into a long life electrode.)
* Mn(OH)2 with stibnite charges to Mn metal in pH 13 alkaline cell - high self discharge, but it may be due to poor mix with coarse stibnite powder.
* New battery cell constructions to make better cells easier.
* Making new cell with new construction & better mixed stibnite (but I'm still not confident it's really well mixed).


Newsletters Index/Highlights: http://www.TurquoiseEnergy.com/news/index.html

Construction Manuals and information:
Electric Hubcap Motor - Turquoise Motor Controller
- 36 Volt Electric Fan-Heater
- Nanocrystalline glass to enhance Solar Cell performance - Ersatz 'powder coating' home process for protecting/painting metal

Products Catalog:
 - Electric Hubcap Motor Kit
 - Sodium Sulfate - Lead-Acid battery longevity/renewal
 - NiMH Handy Battery Sticks
, Dry Cells
 - LED Light Fixtures
Motor Building Workshops


...all at:  http://www.TurquoiseEnergy.com/
(orders: e-mail craig@saers.com)


January in Brief

Solar Cells: big performance gains are possible from any panels

   For DSSC solar cell electrolyte, after all this time, I found a solution of pure iodine and potassium iodide in pure water for sale at a drug store. The bottle was labelled "Lugol's Solution", a name which certainly doesn't betray the contents.
   More importantly, in talking on a chat list, reflection from solar collector glass was mentioned. It seems that about 35% of the total light energy may be reflected over the course of the day, since much sunlight and diffuse sky light often strikes the collector at shallow angles where reflections are as high as total. I then realized that a great application of the nanocrystalline titanium oxide glaze I developed would be to sprinkle it as a frit on the cover glass, and semi-melt it in, to give the glass a 'pebbly concrete' texture. The little bumpy convex 'lenses' would reflect much less of the light that strikes at oblique angles, and the high refractive index of the nano TiO2 would bend it down to strike the active surface more squarely, making for a good performance gain over the day, especially on cloudy days. Daily increase in energy collection could be as much as 45%, but with only a little more at peak collection times (sun straight in front) when an increase might overload or overheat the panel.
   This would be a good project to get back to, but I don't know when. [more details: DSSC Solar Cell project report]

Torque Converter: Magnetic and Mechanical

   By the third, it looked like the magnetic impulse torque converter was definitely going to move cars. Test version 2 showed (virtually by accident) that the mechanical assist idea - slack in the mechanism with a consequent twist of the "hammer rotor" and a hammering of the output shaft when the end stop is reached - can and should play a major part, making very high torque pulses with just a minimal scale of electromagnetic components. This led me to a design change with a modified 'theory of operation'. The revised unit took the rest of the month to make... still without a cover. Initial tests revealed that the return spring arrangement didn't work very well, and that a change from rubber to steel hammers would doubtless be needed. [MTC project report].

Turquoise Batteries - Electrode Compactor Press, CNC Milling Machine, New Construction Ideas, Manganese Negatrode Tests

   For making batteries, I borrowed an antique Book Press with a "steering wheel" handle to try out - it seemed like it should be able to exert very heavy pressure. But first I had to make a new electrode compactor to work with it. This proved tedious work with a file and I wished I had a CNC milling machine. Next thing I knew, we were setting a very nice one up in my machine shop, borrowed. But just as that was happening, another person came along with an even better plan for an economical CNC mini milling machine, using a low cost hand milling machine and a kit to turn it into CNC that could be ordered off the web. It looked like I could be adequately set up for a little over 1000$. Wow! I'd also like to make injection molds to make battery cases and other parts, as well as motor and torque converter parts machining. The first machine will probably go back to its owner at some point.

   I also discovered "Pourbaix diagrams", which give a much better idea of what to expect from an element at different pH'es. These suggested that a pH of around 10 to 13 was optimum for all the electrode substances in question, rather than either neutral salt or fully pH 14 alkaline. I also found that using salt with calcium hydroxide gave pH 12.3, and that KOH with a manganese negatrode gave pH 13, as some Mn(OH)3- dissolves, hits the positrode, and goes to KMnO4 and turns the water purple if the pH is above 13.
   I also did various experiments with manganese negatrodes with stibnite to raise the hydrogen overvoltage. I think it's working, but it's still bubbling, and I suspect the Sb2S3 powder needs to be ground finer and dispersed better through the electrode at small scale.
   In connection with that, I've been considering modifications to the construction to make the cells easier to make, and got a new cell half made by month end. [battery project report]

Other Projects

The circuit boards still didn't come. Communications and customer care don't seem to be on the top of the list of this guy's talents. I finally e-mailed again on the 29th.

Solutions in Waiting - Internet Shutdown Bills

   The more you look, the clearer it is that solutions are all around us, and are being kept from us by the greed of the people at the top of the economic food chain. On the 21st I went into an auto parts store for a rubber piece. It was quiet and just before closing. I mentioned the new 'shockwave' rotary turbine (last month's TE News), and this got the young clerk talking about suppressed engine designs. He soon had names and videos of several much superior automotive engines on his computer screen, some of which have been around quite a long time but aren't in use:
- a "5-stroke" engine with 'water' as one stroke. These are the clean burning ones getting the great mileage with added water that you may have heard of. (Without looking into it, I think the heat in the cylinders turns water into pressurized steam, helping to drive the pistons with the waste heat of combustion - that's where the extra "free" energy comes from - it's energy that usually goes to waste through the cooling system.) I've heard the engines rust early, but if the designers really wanted fuel economy, one expects solutions would surely have been found.
- an "exhaust cylinder" engine where the still pressurized exhaust gasses are decompressed through another cylinder on their way out. He said this gives double the power of a regular engine.
- a "miller cycle" engine is supposed to be better. We didn't look at that one (unless it was actually the name of one of the others).
- a "rotor piston" engine where the crank on the bottom of the piston arm turned a gear running inside a ring gear. I didn't quite follow the purpose, but it seemed it eliminated friction.
- an "Atkinson engine". Again we didn't look at it unless it's the name of one we did look at.
- He said Mazda's rotary engines never had the kind of engineering refinement that went into piston engines - in principle they should be substantially better.

   That people can find and see these sorts of things on the internet is of course the real reason the corrupt are trying to have it more or less shut down. "Know the truth, and the truth shall set you free." "The truth never suffers from honest examination.: - Jesus. "Freedom of the Press" so that we may know the truth has long been one of the hallmarks of a free, democratic society. Since the mainline press is now controlled by the corrupt, people are turning increasingly to internet sources to learn what's really going on - it's the new "free press". If it gets shut down, what happens to our "free countries"? Is our controlled press any better than the Soviet Union's "Pravda"? Do our votes still count for more than they did there? Will our democracy be any better, and people more free, than in that benighted state whose demise we all cheered?
   But people with outdated attitudes die off, and a new generation of Russian leaders starting with Gorbachev had a change of heart. We too will sometime have political and economic leaders that can and will lead, inspired by love for the brotherhood of mankind instead of fear and selfish greed. We await them.

   A friend says he ordered an electric Mitsubishi i-MiEV car. It was supposed to arrive in December. Then January. Now February. And they're changing the terms as time passes. They said he had to get a 5000$ 240 volt charging station built into his house. He pointed out that for his driving he doesn't need one, that a regular wall plug-in is fine. His wall plug-in had to be inspected. Was it inspected? ...Are these proper demands and questions for people who are just supposed to be selling a car? (Can you imagine the gas equivalent?: You have to sign a contract with Shell oil. No? Are you sure other gas stations have the proper fuel? It might void your warranty if you buy gas at Texaco. Maybe we'll have the car we promised you last month next month. Maybe.) He'd better hang onto his converted electric Sprint until he actually has had the Mitsubishi in his possession for a few months and is sure there are no strings attached.
   Then I heard second-hand that one company was recalling their electric cars. The person couldn't remember which company.
   Obviously, just as in the movie "Who Killed the Electric Car", they are still trying to delay and frustrate as long as possible and to get people so annoyed that they decide they won't deal with them and hence don't buy an electric car. Then they'll turn around and say the public doesn't want electric cars. (I considered that line in the movie to be the most outrageous piece of lying effrontery I had heard since the collapse of the Soviet Union.) I'm sure it's the same everywhere. If anybody has had a simple, straightforward time purchasing a new factory made electric car, please let me know and prove me wrong.

   I received a disquieting phone call on January 26th (from "Blainco Enrgy V", a 403 Alberta phone number per my phone display) asking me to verify Turquoise Energy's address and phone number. When I asked, it was "on behalf of oil companies in Calgary". It may mean nothing. But why should they be so interested in other companies affairs? - I've never had such a call from, say, a wind power company, or anyone else, and I can't imagine making such enquiries myself.
   It's obvious that "big oil" reaches far to eliminate alternatives to "big oil". I try to stay off their radar screen, but I must put my work out there if others are to make use of it. I visited an ex employer earlier in the month, the retired Facilities Manager for Greater Victoria School Board. He said I should switch to doing scooters or wheelchairs or something instead of cars, "or you might come home one day and find your house burned down." Best not to dwell long on such morbid thoughts.


Magnetic Impulse Torque Converter Project


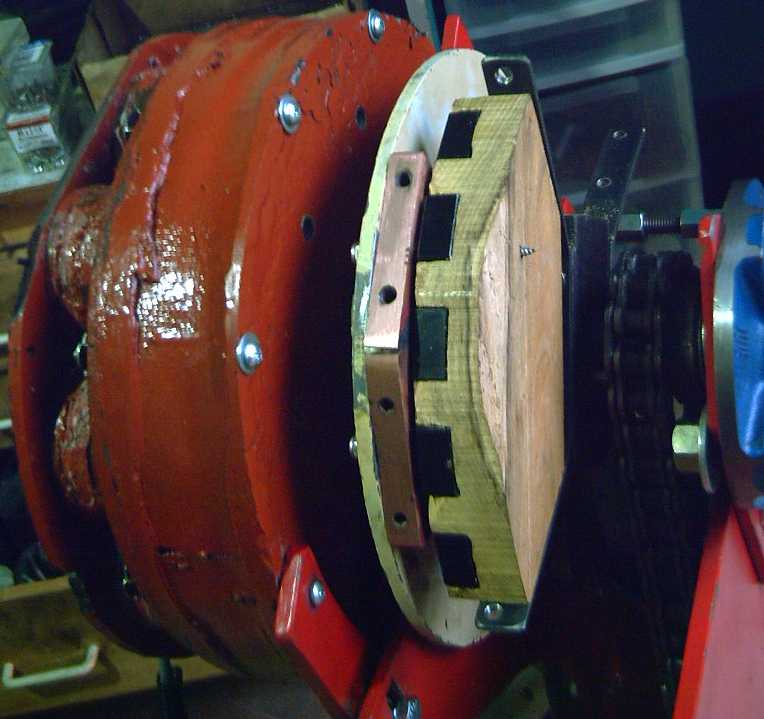
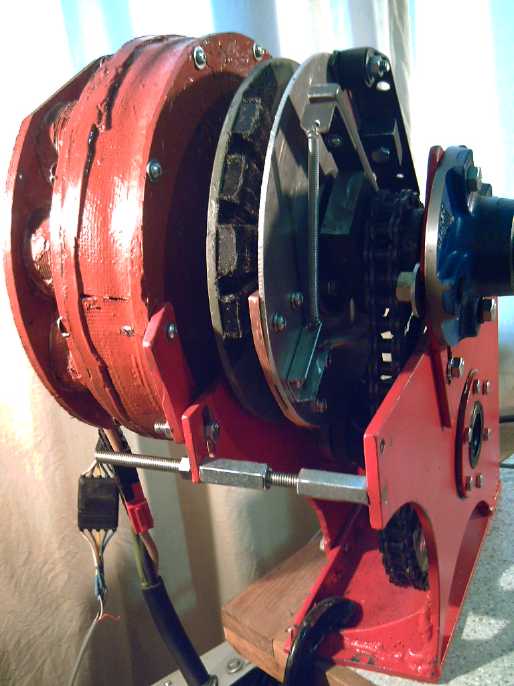
Experimental Version 2: Copper wedge on motor rotor,
and 'wedge' of 5 supermagnets on output "rotor".

Summary

Version 2 was just a bench test version. Per photo, the copper wedge was on the motor rotor and 5 supermagnets making 4 magnetic polarity reversals were screwed to a piece of black locust wood on the output shaft assembly. A torque wrench
on the output shaft measured the force.
   Even at very low motor RPM, this made around 10 foot-pounds of torque whenever the copper and magnets crossed. The motor slowed visibly or even stopped. It picked up speed over the other 4/5ths of its rotation. Of course, the faster the motor turned, the more frequent the torque pulses were, and the more acceleration there'd be. As per previous findings, the strength of the torque pulses didn't increase with speed beyond a certain low RPM point; I'm not sure they hit 15 foot-pounds. The motor rotor was very unbalanced with the heavy copper on one side, so no test went above about 200 RPM.
   Some play in the torque wrench attachment lead to the discovery that if the magnets could pick up a bit of the motor's rotational speed and then suddenly be stopped at the end of the play, the force, tho shorter duration, was doubled and more: readings shot to over 20 foot-pounds even with just a couple of degrees of free play helping each rotation.  With the 4 to 1 chain reduction following, 80 foot-pounds at the wheels should definitely have nudged the Sprint into motion on level ground - all with a motor just turning over and using under 150 watts.

   This led to a modified design incorporating free play rotation, more akin to the first plan in December. The magnetic coupling could be reduced somewhat rather than substantially increased. For version 3, four magnets on the [1/4" steel] motor rotor would interact with a [1/4" thick] copper wedge on the [aluminum] hammer rotor. The lighter hammer rotor would start to spin, accelerating towards the motor speed for about 45º, then hit the end stop, hammering the output assembly with a sudden hit of high torque. In the 4/5 free time, the motor would speed up again as before, and the hammer rotor would spring back to its center. In this design I hoped for 50 or more foot-pounds, to give the wheels 150 or more with a 3 to 1 chain drive. Even more might well be attained, in which case some rubber or springy steel might be added somewhere to spread the torque pulse out over more time with less of a sharp peak. Another idea is to put two supermagnets at each end of the travel to repel each other as they closely approach, eliminating any physical hit. This could also eliminate the need for a return spring.
   For this new working version, different parts and layout were required, so most of the unit had to be rebuilt, which took until the end of the month. First tests on the 31st and February 1st showed the unit to be stiff, and the torque low. Evidently the motor got one too many spacers inside, putting pressure against the bearings, the return springs didn't bring the rotor back near center, and the rubber hammers should be replaced by steel ones. February awaits.

Version 2 Tests

   On Jan. 2nd I made a wooden block "wedge" to hold 5 magnets to "complete" (just for test purposes) the second version converter.
   Next day I got it mounted and tried it out on the bench. The counterweight on the motor rotor attracted the magnets so strongly, in spite of the additional 3/16" gap, that the wedge managed to pull over sideways and clamp onto it. I finally took the counterweight off so that I could run tests at all.
   I tried it with three magnets, and got readings of perhaps 7 or 8 foot-pounds of torque at about 120 RPM. Each time the motor spun to the engaged position, it lost most of its speed. Testing was tricky - if the off-balance motor got up to about 200 RPM, the whole bench (okay, it's not Victoria's most solid, heavy workbench) began to shake so violently I couldn't read the torque wrench.
   Then I put on all five magnets. This tended to bring the motor to a complete stop (great low speed force coupling!), and I had to increase it from 12 to 18 volts. I got readings somewhere around 10 foot-pounds. That would be 40 at the wheels, 'move car on level ground' torque. That was within the target range, but somewhat low. It seemed that even magnets with copper wedges on both faces might still be underpowered for decent vehicle performance, and that two rows of magnets and three of copper wedges would be needed.

   The motor was only using about 7-8 amps at very low RPM and quite a low 'throttle' setting, hence using only a little electricity. 8 A * 18 V = 144 watts, 1/5 of a horsepower input. That would be to get moving on level pavement - power needed would increase with RPM, ie, as the car gained speed. Still, it seems to show the ultra-efficiency I've been after.
The motor could be seen speeding up and then rapidly slowing down with each revolution.

   Then a strange thing happened. When I got the torque wrench handle just right, right angled from the unit, it seemed to be really getting hammered, and the torque readings went as high as about 25 foot-pounds. At any speed where the motor didn't stall, the reading was over 15 foot-pounds. 25 would mean 100 at the wheels, well up towards putting the Sprint on the street.
   Part of my original plan was for a mechanical springyness to assist the magnetism. The output arm would start to turn freely with the input as it flew past, then hit a slightly springy 'end stop' which would transfer both the electromagnetic pull and the kinetic energy of the moving weight suddenly to the output shaft. I had to bend the slightly springy arms around to fit the wooden magnet wedge holder on, and now they wouldn't have much spring to them.
   I had also made the hex shape on the shaft to fit the 22mm wrench socket quite closely. However, the factory made 1/2" square wrench end and the hole for it in the socket weren't such a good fit, and if they were square on, the arm could pivot freely about 1/2 inch before it hit the 'end stop' of the slack in the wrench connection. Thus the torque wrench itself was providing the slack needed to gain the mechanical assistance, and evidently about doubling the peak torque. If I held the arm so it didn't bounce back after each hit, the torque dropped back to the lower levels. The torque wrench was designed for steady readings - the needle bounced wildly with the pulses. I'm understating the actual readings hoping the figures are more in line with the actual case, but there's a lot of room for error.
   Of course without the "assist", the output "gradually" rose to 10 foot-pounds and fell again over the time the magnets and copper were crossing each other, while the 25 lasted only "an instant". The motor was drawing only 7 or 8 amps either way.
   Now if the slack were increased to maybe 3 or 4 inches, the arm would have more time to pick up the motor's speed, and the effect should be still greater - perhaps double again, or even more. With this mechanical hammer assist built into the output rotor mechanism, the 6 inch wedge of copper with 3 or 4 supermagnets (plus a 3 or 4 to one chain or gear reduction to the wheels) really seemed it should have enough force to put a car on the street. I reduced it to 3 magnets and still got up to 20 foot-pounds or so. I decided to go with 4. It seemed that a fair gap, eg 1/10" or more, would work fine - no need to get it to hundredths of an inch with the precision that would call for.

   Another way to give the mechanism more slack - on the car but not on the bench as set up - would be to loosen the chain to the differential. It would be suddenly jerked tight every revolution as the output rotor started to turn. Without a spring there'd be nothing to actively push it back to "start" position again, but it bounced back and forth in the first test at propitious RPMs, as it did with the torque wrench on the bench. Notwithstanding the several deficiencies of the construction, I decided to try it out on the car.

   But the next morning it was pouring rain. Perhaps instead it was time to make that lexan cover to enclose the unit to keep road dust and water out, and so that if anything flew off, it wouldn't hit me, or later, end up lying on the road somewhere. I really like the transparent cover idea, since everyone will want to see how it works once the car is running, and lexan, while it looks the same as plexiglass, is supposed to be able to take rocks thrown at it without getting more than scratched.
   I went out and bought the plastic, but got no further, and I didn't try the unit on the car. The wet soon turned to bitter cold (for Victoria... -6ºc) and snow for a week, so I took the unit apart and picked away now and then at making version 3 in the chilly machine shop.

Version 3


Gluing PP strapping onto magnets


Input/magnet rotor


Pieces of the torque converter: 'anvil' arm on output rotor, copper block side of hammer rotor,
input rotor (before refinishing)


"Finished" V3 converter. Left to right:
- motor
- magnet rotor on motor shaft with wedge of 4 supermagnets
- hammer rotor with copper wedge, hammer assembly with rubber cylinder 'hammers', springs to output shaft assembly
- output shaft assembly with anvil arm, the other end of the springs
- chain drive to differential, then bearing hub for output shaft

   A question was how heavy to make the hammer rotor. It should be lighter so it doesn't slow the motor rotor down as much as it itself speeds up. Banging the output arm with a one pound hammer made 20-30 foot-pounds of torque, and a 2 pounder made 40-60. (Naturally it varied with the swing, and I don't really know how that compares with motor speed. Also the needle arm of the torque wrench bounces so much it's hard to decide what it really reads.) The latter was the desired force range, but the rotor was bound to be over 2 pounds, so I decided the lighter the better. So the rotor is 416 grams of 1/8" aluminum and a 1/4" thick copper block weighing 407 grams replaces the original 1/2" piece. The copper will of course have to be counterbalanced, making over 1200 grams already. Since epoxy doesn't stick to aluminum, the copper and other attachments will be bolted on. I decided to go for rubber 'hammers' to hit the 'anvil' arm with.
   I'm concerned the 416 gram 1/8" aluminum rotor may bend under the forces. If it does I could add some steel bracing, or I have a 3/16" piece of aluminum to try, but weight would be added.

The layout:

1. The wedge of [4] magnets goes back on the 10" diameter 1/4" steel motor rotor. Counterweight opposite the magnets.
2. A 1/8" x 10" round aluminum hammer rotor.

3. The hammer rotor turns on a single bearing on the motor shaft. Putting it on the motor shaft keeps it aligned with the motor rotor. Alignment of the hammers with the anvil arm doesn't need to be very precise.
4. The copper wedge (facing motor) and a counterweight/hammer assembly (other side) are mounted on the hammer rotor. Near the edge on the outside the forward and reverse 'end stops' are two rubber "hammer" blocks, and there's a light spring assembly to return the hammer to center.
5. The output shaft assembly has a stiff 10" steel "anvil" arm matching the rotor diameters. The rubber hammer block strikes one end of this arm to turn it forward, and the other end for reverse.

   Note that everything now mounts on the motor except the 'anvil arm' on the output shaft.

Magnetic Hammers?

   On the 21st I talked with a brother (a biochemist) by phone and described the torque converter. He didn't like having pieces that hit each other that would make noise and would wear out. He suggested having two supermagnets with like poles facing each other, that would repel each other more and more strongly as they approached, and presumably would never quite touch. This would probably also eliminate the need for the return spring, since the rotor would center between the forward and reverse pairs of magnets. Two concerns are:
(a) that the magnets might hit each other if the torque forces are too strong and the magnets not strong enough. That can be addressed with sufficiently large and powerful magnets.
(b) that the magnetic cushioning effect will spread the stopping force over too gradual a time and distance, making the torque pulse longer but too weak. To address that, one could use thinner magnets with less depth of field... but that's likely to cause problem (a).

   But if the concerns prohibit a totally magnetic solution, perhaps one could put in enough magnetic repulsion to handle weaker forces, but still have the rubber end stops for when loading is high. And the magnets could still replace the return spring. I like the sound of using purely or at least partly magnetic 'hammers'.
   I had just completed the hammer rotor unit with rubber 'hammer' pieces when we talked, but assuming that works okay, I'll certainly try out the repelling magnets idea later. (Then it'd be a 'magnetic impulse' torque converter in two ways, instead of 'magnetic impulse-mechanical'.)

How Much Torque?

   I've been guessing that 130 to 160 foot-pounds of torque would be sufficient for the Sprint. I watched a video about the Mitsubishi i-MiEV and evidently it has 180 newton-meters - that's 132 foot-pounds - making it "pretty quick and powerful", the fast starts impressing drivers. And it was doubtless heavier than the Sprint - it had enough batteries for a 90 mile range.
   Sounds like 100 foot-pounds might make it quite driveable. If I can get 40-45 from the converter and reduce it 3 to 1 with the chain drive, that's 120-135. That sounds doable. 2.5 to 1 or 100-112 foot-pounds would improve top speed from under 60 to about 70 KPH. (With the 4 to 1 reduction I'm using for testing, it'll be under 50 KPH. But it gives 100 foot-pounds at the wheels with only 25 from the torque converter.)
   Of course, intermittent pulses of torque aren't going to give the same acceleration as continuous torque. It's still "try it and see" in many respects - the final effect isn't readily seen in advance of experiencing it.

Magnetic Impulse Torque Converter Theory (Modified)

1. The motor has a 10" diameter rotor on on its shaft, the input shaft to the converter. This rotor and the motor's internal magnet rotor act as a flywheel to store up kinetic energy as the motor rotates.

2. The rotor has four supermagnets arranged in a wedge shape on the side facing out, N-S-N-S
, to cause rapid transitions from null to north to south to north to south to null as the magnets spin past a given point.

3. A hammer rotor is mounted on a bearing on the motor shaft. It can thus turn independent of that shaft, but only for a small angle relative to the output shaft, about 30-45º either direction, then its hammer hits an end stop on the output shaft. When there's no force acting on it, it returns to center between the end stops on the output shaft via a light spring.

4. This hammer rotor has
a 6" long (O.D.) by 2" wide by .25" thick wedge of copper, oriented so that its flat face almost touches the flat face of the supermagnet wedge as it spins past, with a small flux gap.

5. This is the magnetic impulse part: As the 6" copper wedge spins past the magnets, most especially at their sharp north-south magnetic transitions, the magnets generate electricity into it. The electrons looping though the fat copper short circuit create an equal and opposite magnetic field*, which resists the motion of the magnets across the block. The hammer rotor with the copper wedge is strongly pulled and starts to speed up towards the motor speed. At the same time the motor is being slowed by the same force, but the hammer rotor is lighter. Before the magnets reach the end of the copper, the two rotors are traveling at almost the same speed.

6. This is the mechanical hammer part: The hammer rotor, now going at the same RPM as the motor, slams into the end stop. For an instant, a very high torque is generated, similar to a hammer hitting a nail, and the output shaft is given a twist; driven around.

7. If the load is heavy, the output may move a fraction and stop. Facing uphill with a low motor speed, it may even turn back again. If the load is light, or else as the motor speed increases, the output shaft won't stop turning between hits and will accelerate with each hit.

8. As the motor magnets pass the end of the copper wedge, the output is 'disconnected' from the input: no force or motion is transferred. For the other 4/5ths of each rotation, the motor spins freely and picks up its lost speed, until the magnets and copper wedge cross each other again.

9. As the output accelerates, the motor will likewise pick up speed. When providing torque, it will always be going a little faster than the output, by perhaps 50 to 400 RPM, depending on the torque required. This provides a variable transmission ratio based on speed and torque.

10. If, as seems likely, the torque converter output torque isn't high enough by itself to properly propel a vehicle, the output shaft feeds a fixed ratio reducing gear to divide the speed and multiply the torque instead of turning the car wheel or drive shafts directly.


* Callisto, a world the size of Mercury, has a weak and fluctuating magnetic field induced the same way - by Jupiter's strong field, through its conductive salty water mantle. Callisto also gets speeded up (so slightly) in its orbit as "the motor", Jupiter, and its magnetic field, rotates every 10 hours, much faster than Callisto's 16 Earth day orbital speed. According to scientists, airless Callisto (in common with Ganymede and the leading hemisphere of Iapetus) has a dark, fluffy surface of polycyclic aromatic hydrocarbons - the stuff of life.


LED Lighting Project

    On the 4th, seeing what might be good markets, I decided I should get going on a system to produce LED light fixtures more rapidly. I made a drill template for the 1100 lumen "cold white" (slightly bluish light) fixtures, and the next day I bought a piece and made an attachment to hold the plastic bases (3" PVC plumbing pipe caps) on a stepper motor from the CNC drill router.
   With that, many small vent holes, the globe attachment holes, and the power socket hole can be drilled with good, even placement. Of course, the holes will all have to be drilled the same size, and the power adapter hole will be drilled out to full size (1/2") later.

   I had the machine make the first set of vent holes - worked nicely - and put together a new 1100 lumen cold white globe fixture with that base and the new heatsink drill template, but I was more excited by battery chemistry and torque converter developments, so there things sat for the rest of the month except for a couple of LED fixture parts purchases.

A CNC Machine Improvement?

   It would be good to make the vent holes bigger than the globe attachment holes, and indeed on more than one part it would be valuable to have at least two different size drill bits. To stop and change bits is a hassle, and has to be done by swapping two CNC drill programs back and forth, with much delay and all the dangers of something going wrong and things getting misaligned. I was starting to think that a way to change tools or drill bits within a CNC program would be valuable, but it seemed it would be very complex. Then I got the idea to mount two drills side by side, farther apart than the size of the workpiece, eg, 12" would do for these and for up to, eg, 12" motor parts as well. They would both run, and when the other drill size was wanted, the drill position would simply be shifted 12" to place the other drill over the work.
It would take some setup work and a couple of new, matching, drills - but it would be a big help.

   Those holes are around the rim. The holes in the back still need to be done first, by hand with a template. The 'keyhole' holes for hanging the fixture on a wall increase the requirement from 4 to 6 holes (two large ones for the fat part of the keyholes) and filing down from the small hole in the keyhole to the large one.
It's worth it - in no other way is it possible to install a light fixture simply by hanging it up, without even opening it. The days of immobile wired-in light fixtures may be numbered!

   I must next consider whether a switch might not be a good option for lights on the wall that are easy to reach. And if a switch is going to be added, whether that might not b a 3 position switch: soft-off-bright.

   I've heard nothing from Energy Star. At the moment I'm assuming Turquoise Energy has been registered in the program. On the 31st I e-mailed and asked how to submit the lights for testing.


DSSC Solar Cell Project - Potential Revival

   Two things happened to renew my interest in this project. The first was finding the electrolyte for DSSC cells, I2+KI in pure H2O, in a bottle at a drug store. It was labelled "Lugol's Solution", which name certainly disguised it quite effectively from anyone looking for iodine.
   Second and more importantly, there was an e-mail list discussion about a 3-D solar collector, which could capture more solar energy from a given surface area. One of the claims really surprised me: that since the collector cover glass reflected about 35% of the light, light reflecting off one panel could feed others within the 3-D structure. This uncovered a significant potential value of the nanocrystalline titanium dioxide borosilicate glaze mix I created in summer 2010.

   At first I thought they must be exaggerating to make the 3-D system sound better. I'd guess that when the light is beating straight down on the collector, there's surely much less reflection than that. However, as the angle of incidence decreases, eg, in earlier morning and later afternoon, the glass would indeed have very high reflection if not total internal reflection, so it might very well be that 35% of the total light is reflected away from the cells over the course of a day, and hence 35% of the potential energy is wasted. And much of the diffuse light coming from all over the sky, including on cloudy days, must also go to waste.
   Furthermore, most of this loss would occur when there's less light energy per unit area, at which times the cells wouldn't be overloaded or overheated by getting more light. So the effect of lower reflection would be to increase the average daily output, potentially up to 35%, without adding a lot to the peak collection when the cells might potentially overheat.

   With this background, it can be seen as very significant that nanocrystalline surfaces with nano-scale surface irregularities, reflect less light than flat surfaces. Moths' nanocrystalline eyes are virtually non-reflective, unlike almost any other creature's.
   But why not expand on this? Why have flat glass at all? A good plan might be to grind the "glaze mix 9" (TE News #29) nanocrystalline titanium dioxide borosilicate glass into a frit, sprinkle it on a piece of regular window, greenhouse, or borosilicate glass, and heat it until it spreads but only partly melts in, leaving a pebbly surface texture of 'random' little convex lenses to collect oblique light and transmit it through. Perhaps the dust could be suspended in water and sprayed on the main glass with an atomizer.
   Much oblique light would hit a convex glass surface facing it, at a steeper angle than flat glass, again reducing reflections. The high refractive index of titanium dioxide would help the 'lenses' bend the light into a straighter course through the glass, to strike the collecting surface more steeply. This might especially benefit polycrystalline or amorphous silicon panels. Thus more of the 35% would be transmitted instead of reflected, boosting the energy collection of the same panel. If 25% of the normally reflected 35% was transmitted to the cells, they'd receive 90% of the day's light instead of 65%... a 38% performance improvement!
   On cloudy days when light is diffuse and striking the collector from "everywhere", low and high angles, the gain should be considerable, catching the most of the scant available energy.

   The nano TiO2 glaze surface is the important part. Only a sprinkling of the new glaze on existing glass is needed - much simpler than making whole glass sheets from scratch!

Trying a commercial solar PV panel

   My first thought was to simply buy a small panel, remove the cover glass, and work with that. I bought one at Canadian Tire for 17$. Sure enough, with the unit held at oblique angles, the collector surface was dimly seen or not visible - mainly external reflections could be seen in the glass.
   But when I disassembled it, I found that the cells were some sort of film on the back of the glass, not separate items as I had expected. Obviously the solar cells would be destroyed by the heat of the kiln.
   Then I was told that was the case for amorphous silicon, but not for polycrystalline or monocrystalline.  It seemed that I might either find the right type of silicon cells, or make DSSC cells. But I might not find a silicon panel that could be separated from the glass small enough for the mini-kiln. At a solar collector store that proved to be the case.
   The glass of the one I bought seemed to be cheap greenish "window glass", not a good borosilicate ("pyrex") glass for maximum transparency. (What did I expect for 17$?) "35% reflections" seems more and more likely to be a pretty good estimate.

   Evidently the first step, then, will be to grind some frit and try making a piece of pebbly surface glass. Then I'll probably need to make a DSSC solar cell to test it with.


Turquoise Battery Project

Summary

   I found and borrowed a "book press" and made a new electrode compactor to work in it. I crushed some of the quartz/stibnite rock with a hammer and made a manganese negatrode with stibnite additive in it to increase hydrogen overvoltage. The stibnite is likely to form keresemite (Sb2S2O), "the least oxidized" such compound of antimony, in the reducing electrode.
   I made a cell. The monel positive electrode could be seen to convert to blue-green nickel and copper oxides/hydroxides and to swell into every possible niche inside the cell. The conductivity became poor. I came up with the idea of wetting the positrodes while they were held compressed and leaving them a day or two, to keep them from swelling before they hardened up some.
   I discovered "Pourbaix diagrams" that plot compounds formed by a metal that predominate at different voltage potentials and pH'es of solution. This added both insight and complication. For example, it appeared that at neutral pH, the Mn(OH)2, or perhaps some unspecified amount of it, would dissolve as Mn++ ion. This suggested that a somewhat - but not strongly - alkaline solution would be best. But then, a nickel Pourbaix diagram showed that nickel should dissolve to Ni(OH)3- ion at pH 14, which it clearly doesn't do to a notable extent in all those Ni-Xx alkaline batteries. (But then, maybe that's why they don't have unlimited, indefinite cycle life?)
   I discovered that my salty electrolyte was in fact rather alkaline, evidently 12.3 from the calcium hydroxide layer in the positrode.
   At least the grafpoxy seemed to be working - the cell continued to work without the meager specs degrading or the electrode grills falling apart - hurrah!

   The next cell is to incorporate these findings and techniques. It is for considerartion whether to use the Ca(OH)2 and have a "somewhat alkaline" cell, or leave it out and try a neutral pH. The "somewhat alkaline" is more likely to have the desired hydroxide reactions, whereas the really neutral cell may discharge the negative to chloride rather than hydroxide, which would be a dissolved ion form as indicated in the Pourbaix diagram.

   Then I decided to make a Mn alkaline cell pocket negatrode with the remaining MnO2/graphite/1% stibnite mix, and put it in with the nickel positrodes from a nickel-iron cell. Would the Mn in alkali (a) dissolve, (b) bubble hydrogen, or (c) charge and work? I put it in a perforated brass screen pocket - pretty coarse compared to the original pockets - wrapped it in zircon coated watercolor paper, and put it between 2 of the original NiOOH pockets in the NiFe cell case. This one was pretty well enclosed on all sides. It seemed to be part of (b) and (c). In some ways, the performance was excellent, but it didn't charge well or hold the charge very long. I eventually decided the stibnite probably wasn't very finely dispersed, so not all of the electrode substance was getting its overvoltage raised. Possibly also the brass metal was a problem. On the 26th my new stibnite powder arrived.

   This month I also posted an unfinished preliminary version of "How to Make Economical, Green, High Energy Batteries" in response to e-mail queries. It would be better to wait until I have working cells, but after 4 years I felt I had learned enough to put it down in case I got run over where the city refuses to put in a crosswalk for us where it's most needed.

New Compactor & Book Press

   I went to a new years eve party/music jam. I noticed the hostess had a couple of heavy looking presses in the hallway with big "steering wheel" cranks to tighten them. I wondered if they might be suitable for electrode compacting, instead of doing up 14 small bolts around the edges of the compactor box.
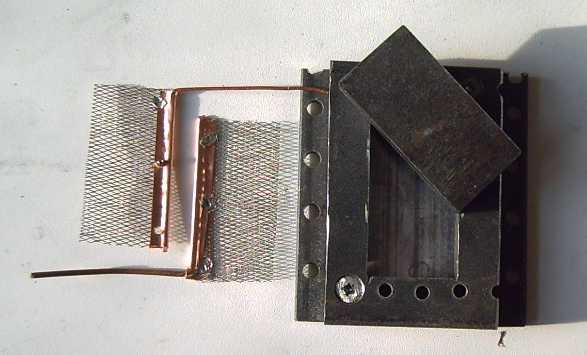
   She said they were called book presses, and I borrowed one to try out. Then I realized it would be tricky to use the existing compactor box - it depended on the side bolts to hold the side walls on during compaction, and the bolts would be in the way in the press.
   So I spent several hours making a new compactor box with 3/4" thick walls around the box, all one piece. After hacking out the 1.5" x 3" electrode size a bit undersize with the angle grinder/zip disk and drills in the corners, most of the time was spent filing out the hole to smooth, exact size with files.

   I couldn't help but think the compactor would have been far easier with a CNC milling machine, and it would have done a better job - a couple of zip disk cuts still showed in the finished piece where it had cut a touch too far, and the angles weren't exactly 90 degrees.


Milling Machine

   I've been vaguely thinking a CNC milling machine would be a great thing to have to create precision steel parts. In particular, electrode compactors, and injection molds for battery cases & lids and for filler caps/one-way vents might be helpful. I know a place that does plastic injection molding - perhaps I'd make the molds to create my shapes and suit their machine requirements.
   It can have uses for other things as well, eg, cutting key slots in motor shafts, cutting out copper wedges and perhaps other parts for torque converters, but salable merchandise for the battery project was my main thought.

   The short story is: I got one for a little over 1000$. Unless you just like stories, or want to know how to get a low cost CNC milling machine, I suggest skipping from here down to the next heading.

   On the 7th I went to a group brunch at a restaurant, and came home at 4:30 with a CNC milling machine. My friend who had sold me the CNC drill & wood/plastic router, had purchased the milling machine just prior to that, but hadn't even set it up in a year and a half. He suggested we set it up at my place, and so we spent the afternoon packing, transporting, and assembling it. I figured having someone else's machine in my shop couldn't be a lasting arrangement, and considered mortgaging my house to buy it from him and have money for the rest of the year (and for LED light fixture parts if I got a good order).
   But as we set it up, another friend happened along. He mentioned that the new Princess Auto store had a mini milling machine, with hand cranks, for 600$. Then you order a kit off the internet for another 600$ that turns it into a mini CNC milling machine.

   I went out there and looked, and the machines were on sale for just 420$, complete with beefy looking precision drill chuck and a heavy collet chuck with 8 collets - surely a couple of hundred bucks to buy separately, and the big machine didn't have them. I bought it. It's much smaller and lighter, with a more limited work size (4" x 8" instead of 8" x 8"), but it seems decent and is probably sufficient for my milling needs. There appeared to be about three different kits available to turn it into a CNC machine, and the one that sounded best to me was also cheapest at 465$ [StirlingSteele.com].
   These kits are just the mechanical parts and don't include stepper motors or computer interfaces. I can probably buy a couple of used stepper motors, and as long as I only use the milling machine occasionally, I might just unplug the stepper motor cables from the drill-router and plug them into the milling machine, and hence use the same computer and setup for both. That technique worked well for the LED light fixture vent hole driller, where I unplugged one axis and plugged it into another motor that rotated the fixture base.

   Amazingly then, it seems I'll soon be set up to mill steel for not much over 1000$. If the second friend hadn't payed me a rare visit right while we happened to be in the middle of setting up the big machine, after the impulse decision to do so that morning at brunch, the subject would never have come up and I'd never have heard of the mini-mill and CNC conversion kits. Kudos to the angels for managing to set up this remarkable convergence!

Manganese Negatrode (take 3)
A Pourbaix Diagram for Manganese suggests that pH 8 to 13 would
be good for a battery using it, as it has no dissolved forms
anywhere below around a volt at those pHes.
   Zinc is usually considered to have the highest usable negatrode voltage, -1.05 volts in salt solution. Manganese is perhaps the next voltage up of the usable elements. I was guessing that its potential in salt was the average of acid and alkali, -1.37 volts. I knew that was risky but had nothing else to go on.
   Recently I found (for the first time) something called a Pourbaix diagram (first ones were by Pourbaix, 1966), showing the predominant forms a substance is most likely to take at different pHs as well as at different voltage levels, and I found one for manganese.
   As can be seen, the potential for the Mn (0) to Mn (+2) reaction is about -1.18 volts from acid to neutral pH. That's only about -.13 volts higher than zinc at pH 7.
   Nevertheless, in previous attempts, my Mn electrodes have bubbled hydrogen and wouldn't stay charged very long.

   Furthermore - and this was unexpected and disconcerting - at neutral pH (7), the discharged state of the Mn appears more likely to be a dissolved ion (MnCl2?) than solid Mn(OH)2. This suggests that cells using Mn negatrodes should be somewhat alkaline, at least pH 8 but not beyond pH 12-13.

   Here we also see perhaps why no one has used Mn negatrodes for alkaline cells, even if the -1.56 volts permits: it would seem it forms a soluble ion, Mn(OH)3-, at such high pH (14).

The page that I got the Mn Pourbaix diagram from,
Diagrams That Provide Useful Oxidation-Reduction Information; www.wou.edu/las/physci/ch462/redox.htm , had other diagrams I hadn't seen before and seemed to be a fine treatise on the whole subject.

   Pourbaix diagrams seem to have limitations. Those from different sources don't all seem to agree with each other or with some known battery reactions. One set of Mn ones suggests the pH should be at least 11 or 12, that 8 to 10.5 would be Mn++ instead of Mn(OH)2, a considerable discrepancy. It's probably not that one or more is wrong, but for example the condition of the those diagrams was "very low concentration" of the element in question, as pertaining to its transport through the water table - hardly the conditions in a battery. It may be that only a bit will dissolve as Mn++ even at pH 7 owing to limited solubility, and then the rest will be solid Mn(OH)2 in the electrode. And many of the diagrams only go to about ±1 volt, even just -.8, which leaves out the most interesting battery reactions of charging to elemental iron, zinc, cadmium, and even hydride. For high energy batteries we're most interested in about 1.0 to 1.5 volt reactions.

   Hydrogen voltage at pH 14 is -.833, the voltage of metal hydride cells. Various electrode substances prevent it from forming until a higher voltage is reached. Zinc (-1.05V in salt, -1.24 alkaline) works as-is, but its performance can be enhanced by additives to raise the hydrogen generation voltage. Iron (-.93V in alkaline) has a lower hydrogen overvoltage. It works but tends to bubble hydrogen. Work in India in 2004 used 1% bismuth sulfide to raise the overvoltage, and a platinum-rare earth catalyst to recombine O2 and H2 into H2O, permitting sealed NiFe dry cells for the first time. Manganese (~-1.56 @ pH 14) won't quite charge. The electrode bubbles hydrogen instead.
   A year ago and more, I thought manganese could make a higher-energy negatrode, provided the electrode's hydrogen overvoltage could be increased by whatever small amount was needed to charge Mn(OH)2 to Mn metal particles instead of generating hydrogen.

   Others have used transition metals - tin, mercury, bismuth, gallium and indium - or their oxides to raise hydrogen overvoltage for zinc. "Traditionally" (before the 1970s), about 2.5-4% mercury oxide was used. When the other transition metals mentioned were tried (probably because of the toxicity of mercury), it was found that only .05-.5% had to be added to get the effect.
   From reading other results, I thought that cheap antimony - to the right of tin and above bismuth on the periodic table - tho untried by others, would probably work best. First I tried antimony oxide. That didn't quite seem to do the trick.
   On looking at the web, I found a 1962 research article abstract that indicated egg albumin (main ingredient of eggwhite) should raise it, seemingly more than enough.
   Unfortunately both additives left the manganese with too high a self-discharge rate to be practical. I planned to try antimony sulfide, but finally quit trying without getting hold of any.

   I'm finally trying it. I got hold of a quartz rock with "stibnite" (antimony sulfide mineral) in it as a source. I broke off a piece and put it in water, and some yellow-bronzy colored stuff appeared. At first I thought it was sulfide turning to oxide, then I decided it was most likely some other 5A element "impurity" - a phosphorus or arsenic compound. I scrubbed it with a toothbrush and got some of it off.
   I only want maybe 1% antimony sulfide in the electrode, and the quartz should be pretty inert. But things that leech out of a rock in water probably aren't the best inside a battery!
   The stibnite (Sb2S3) may form kermesite (Sb2S2O), "the least oxidized" derivative, in the reducing negatrode environment. Both forms are virtually insoluble.

   With the rock in my possession, I then magically ran across a US company [americanpyrosupply.com] that sells antimony trichloride for pyrotechnics (12 $/#) and ships to Canada (and via the post office). I ordered a couple of pounds, which arrived before month's end.

   I considered that if I used the Mn metal powder, it would be likely to have particles that were too large (even tho it was <320 mesh sieved), and wouldn't get adequately mixed with the Sb2S3, and so the electrode would again have high self-discharge as well as low amp-hours for the amount of manganese. (In fact, maybe that was the problem, or part of it, before.) The 1969 book Alkaline Storage Batteries noted that in all cases, zinc electrodes from zinc oxide worked better than those made from zinc metal powder. And the zinc powder was surely finer than my manganese powder.
   If I used MnO2, it would be likely to shrink and 'de-compact' itself as it lost oxygen atoms. And if I used MnO2 from a dry cell, it would probably have more graphite than was good or useful. MnO2 from the pottery supply might not be very pure.

   I decided to put some of the metal Mn powder into water and let it discharge itself to [presumably nanoparticles of] Mn(OH)2 (or MnO), and then dry it and crush it in the mortar with the pestle. I would mix that 50-50 with some MnO2 from a battery and add the 1% antimony sulfide. That would reduce the graphite concentration and start the electrode from a 'less overdischarged' state.
   I put 30 grams into a small beaker and added water. A little stirring brought the bubbles of hydrogen up and turned the water grey with Mn [hydr]oxide. The strongest reaction proceeded over a few minutes in cold water without noticable heat. The water would clarify, but for several hours, each time it was stirred, tho decreasingly, more bubbles would rise, perhaps showing it was fairly close to not self discharging even without any additives. I wasn't sure all the powder converted - perhaps a skin of oxide formed on the outside of each grain, protecting the interior. (Aluminum does that in neutral pH, and even in air.) Oh well, close enough?
   Monel or nickel powder would have made no bubbles; zinc, few to none; magnesium (~ -2.5 V) might have frothed violently (as does aluminum in alkaline solution (-2.33 V), making a lot of heat); sodium (~ -3 volts) would have virtually exploded when the water hit it.

   But after this supposed 'conversion' to oxide, the powder still weighed 30 grams. Losses of material in pouring and handling were minor. Obviously MnO or Mn(OH)2 with the same Mn content should have weighed more than the original Mn (38 or 48 grams), so the conclusion is that not much of it reacted and it's still mostly Mn powder. Probably the skin of oxide was formed on each particle, preventing interior oxidation. Either that, or the stuff just wasn't self discharging... but why would some do it and not all of it?
   I tried grinding it in the mortar and pestle, but when I added water again, there were few bubbles. I suspect it wouldn't give 1/10th of the theoretical amp-hours rating because, small tho the grains were, only their skins would react. So I decided to go with straight salvaged dry cell MnO2/MnOOH despite the excess graphite (probably totally unnecessary) and the 'overdischarged' initial state. (So much for the pricey tin of Mn powder.)

   So I measured out 40 grams of salvaged dry cell MnO2. It was much bulkier and probably was about 35% graphite, leaving 26g of MnO2 or 16.5g of Mn. At 951 AH/g of Mn, that's a theoretical 15.7 amp-hours. (I'll be extatic if it gets 5. Of course, I'll be extatic if the battery works properly at all!)
   1% Sb2S3 would be .4 grams. That's more than 1% of the MnO2, but some will be next to the graphite instead of the Mn, and it's not very fine powder. Now the rock is maybe 2/3 quartz, so that's 1.2g of finely pulverized rock to add. Maybe 1.5 or 2 for good measure. The piece I pulverized made 1.65g so that's what I used.
   I also decided to add 2% (.8g) "vee-gum" (a bentonite clay mix, sometimes used to thicken lotions and creams) to act as a binder/glue (having no PTFE or PVA). I don't think there's any binder used in dry cells.
   I ground this mix with mortar and pestle. I continued quite a while as I could hear particles being ground finer. Finally the visible white bits (vee-gum) in the black mix became tiny, and few and far between, and I figured the antimony must be about as well ground down and spread around as it was going to be.
   Well, it had graphite, so I used diesel-kleen to wet it down, 2 grams. When this was well mixed in, I put 1/2 into the compactor, inserted the the current collector screen with terminal wire, then the other half of the mix.

   I finally got to try out the book press for compacting electrodes. It was probably about as good as the "bolts around the edges" compactor, and somewhat less work, tho I certainly had to crank it hard. (It was tempting to use a pry bar, but I didn't want to risk breaking it - it's not even mine.) The electrode measured around 100-120 Ω or more between any two points. A clump of salvaged dry cell measured around 30+... at least 3 times more conductive. They may get better compaction at the factories, but it's also possible conductivity gets better after sitting a while, after electrolyte is added, or when the cell is in use. Certainly rechargeable electrodes seem to harden up with a few cycles, and the manganese should also conduct better as it charges to a lower oxide and then to metal.
   However, the punch jammed in the die and I had to hammer it through. This broke up the electrode, the top half separating from the grill, then breaking into 3 pieces. I would have tried again, but even the bottom half plus the screen was 4+mm thick, so I decided to use that as it was. Graphite sure adds bulk!
   And the grill must have scraped against the side of the compactor - bare copper was showing. Since it was at the bottom on the far side from the terminal connections, and since it was the negatrode, which would corrode much more slowly, I decided it should last long enough to tell if the manganese worked properly or not. The leftover grafpoxy in the freezer wasn't quite hard yet and I managed to touch it up a bit, but there's no guarantee it's fully covered.

   Hmm... Diesel Kleen contains trimethyl benzene... toluene is methyl benzene. Am I doing the same thing twice, first using the one during compaction, then pouring a little of the other on to soak into the finished electrode?

-----

   For a positrode, I used a slight variation on the mix that gave the rather successful nickel-zinc battery in October (TE News 45).

15g monel mix (AEE monel)
4g KMnO4
12g graphite
.3g Sunlight
3.0 diesel kleen

   This one gave resistance readings in the 20's of ohms range. It would probably go up as the monel charges to nickel hydroxide & copper oxide.


Ni (L) & Mn (R) electrodes as compacted


After painting Ni with Ca(OH)2 and torching
The water of painting brought out KMnO4 purple color

-----

   As the 'trodes were drying in the toaster oven outdoors, I realized there was no way I could torch them with the grills exposed, even underneath. I'd be bound to burn off some grafpoxy around the edges. But they both came loose from their grills... Ugh! So I torched the front face of the loose briquettes.
   I've been looking for finer grilles - maybe I should be looking for coarser so the briquettes don't split apart at them. On the other hand, the 3/8" wide foil section with the rivets at the top is probably the real culprit that got the splits started.
   I did the separators and put everything into the acrylic case. Then I slid a piece of plastic behind the positrode to take up some of the remaining slack space.

   I filled the cell and left it to sit overnight. In the morning, the purple permanganate color in the water at the positrode had been replaced by solid green-blue of nickel and copper oxides: the monel, oxidized - and hence swelled up - by the permanganate. Resistance had increased to over 1 K Ω to the terminal - ugh!
   At 2 PM I added a bit more water as the level had dropped a bit, and put on a 15mA charge. After 10 minutes and with the cell at only .7 volts, I decided that was too timid and doubled it.

   The voltage drop when the charge was removed suggested that the overall internal resistance was about 15 ohms - ouch! (.45 V / .03 A = 15) 1% that high would be nice. Perhaps it might improve with charging... but I've hoped that before in vain. (It didn't.)
   Certainly having the briquettes split in half and coming loose from the grills can't be good. I think a finer grill and wire that I can tack weld should be better than rivets and the copper foil. Then, mashing them into place with no spaces left over at all should prevent them from swelling up so much. The most successful cell was the one where the positrode had the least space to swell into before it was first charged.
   In fact, maybe what I need to do is wet them while held clamped together, and leave them for a day or two before trying to insert them into the cell at all. Then they should start to harden up and should be less prone to swelling once inserted.

   After 24 hours the cell was still only up to 1.4 volts on charge, up from 1.0 initially, and dropped quickly (~1 minute) to about 3/4 of a volt when the charge was removed. Well, that would come with starting with both electrodes in an "overdischarged" state and charging so slowly.

The 'idle' and 'load' voltages were read when the voltage drop decreased to less then 1mV/sec.

10m 1.0 volt on charge (14th)
24h  1.4; Idle: .75; 100 Ω Load: .67v
48h  1.7; Idle: 1.09; L: .77
56h  1.84; I: 1.28 ; L: .94
72h  2.29 (66Ω); I: 1.51 ; L: 1.12; pH 13
96h  2.19 (82Ω); I: 1.59; L: 1.19;  pH 13
120h: 2.29 (66Ω); I: 1.62: L: 1.24; pH 9 or 10 (19th) - it went back up to, um, probably it was 12.3

   After that only minor voltage changes were seen. Like some of my other cells with high resistance, it wouldn't hold anything like the expected voltage, but it would deliver small currents for hours at voltages below a volt. (The voltage of NiOOH + Mn(OH)2 is +.49 - -.25 = .74 volts, with the Mn(OH)2 discharging to Mn2O3.)

   After 3 days, it finally occurred to me to check the pH of the electrolyte of my neutral salt solution. The bubbling Mn- was 13! Let's see... I put in Mn in the '+' side as KMnO4. That would reduce to MnO4, leaving K- and 2O--. The spare K would "obviously" form KOH, making the mix alkaline. I added a few drops of HCl to change the KOH to KCl - my salt. The bubbles 'instantly' vanished. It went down to pH 8 or 9, apparently the desired range from the pourbaix diagram.
   Then I checked the other side of the separator, where I had also dripped a few drops of acid. pH was 1! Let's see... pH 1 on the positrode side, and 8 on the negatrode. But that was just dripped into the surface water above the electrodes. After a while they were coming back into balance. The next morning it was back to 13, on both sides. I added a couple more drops of acid, but in a couple of hours it read 13 again. I did it again in the afternoon.
   On the 19th I figured out the likely answer: calcium hydroxide is only very slightly soluble, but the bit that dissolves imparts an alkalinity of 12.3 in clear water. That must be reading as "13" to my broad range pH paper test strips. Thus, the pH is bound to stay at 12.3 until the Ca(OH)2 is all converted to calcium carbonate by atmospheric carbon dioxide or other reactions.

   But what did I want? The idea of putting in calcium hydroxide was to have it set like cement as calcium carbonate to make the surface of the electrode hard, not to have it make the electrolyte alkaline. But according to the newly found Pourbaix diagrams, All the chemicals should definitely be solid at pH 11-13. It should be better than either neutral 7 or 'totally' alkali 14. Perhaps I should want a "somewhat alkaline" battery? If I want the cells to be pH 12.3, I should add the lime. If I want them at neutral pH, I should leave it out, or be sure the calcium turns to carbonate before putting the cell into the battery. Either way, I'm sure the cells definitely should be as sealed or as separated from atmospheric air as possible.

   Let's see now... at pH 12.3, it looks like the Mn should be about -1.4 volts, and the nickel +.6, total 2 volts. At pH 7, the Mn should be about -1.2 and the nickel +1.1 or so, total 2.3. After 5 days, the cell didn't seem to want to charge to either of these figures and both electrodes were bubbling. Perhaps it was time to make a new case with a good lid, and a new cell, trying out the "wetting while compacted" to prevent the positrode from swelling and losing conductivity.

   I must say working with salt electrolyte is more involved than just O.D.ing everything with acid or alkali, pH 1 or 14. Put the right things in potassium hydroxide, they just work, and they seem to hold a charge. The oxalic acid cell worked. No wonder earlier researchers went along those lines - to them, getting something that actually worked, in a reasonable time frame, was the main goal. Salt... It's hard to get it going and hard to get things to hold a charge, and the pH is a big variable. But there's a wide field of potential chemistries... and standard ammonium chloride dry cells obviously do work. (A friend who once experimented with them says they'll recharge once to about 70% of original capacity. After that they leak.)

So, Alkaline experiments...

   I'd been thinking for some time of a couple of experiments with zinc and manganese in KOH solution, for which I could use some of the nickel electrodes and the case of the nickel-iron cell. With the zinc, the experiment would be to wrap the electrode with paper painted with zirconium silicate as an ion shield and see how it holds out over time. With the manganese, it would be to try out an Mn electrode with Sb2S3 as the overvoltage additive and see if it works in an alkaline cell.
   The first one to try was the Mn - also with the zircon wrap. If that worked well, future Zn alkaline electrodes might be rather pointless since Mn is higher energy (both volts and amp-hours), just as cheap, and long lasting. According to the dual alkali & acid electrochemical chart, the Mn would maintain solid forms at all points of charge and discharge. According to the Pourbaix diagram it would form Mn(OH)3- instead of Mn(OH)2, and dissolve. If it worked with the zircon, next I'd try it without, since according to the first chart it shouldn't need it.

(R) Pocket electrode from nickel-iron battery, some iron filler behind
(L) Replacement brass pocket with Mn electrode for test
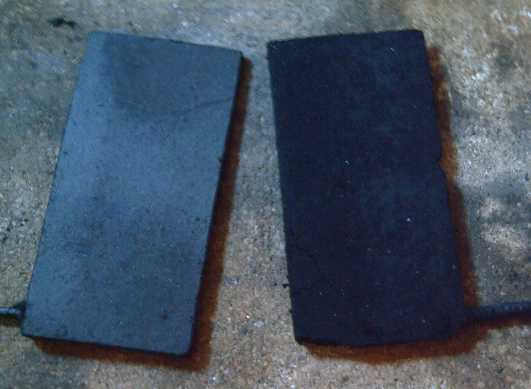
   On the 22nd I tried to dig the iron out of an iron pocket electrode to replace it with the manganese, but it was tough going. Probably it was charged to iron particles that would be sintered - electroplated - to the pocket walls. Fully discharged to Fe3O4 it
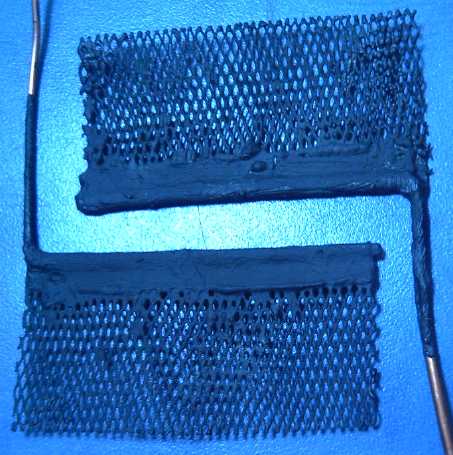
 should have been easier.
   So instead I made a new 'pocket' from perforated brass. The holes are huge compared to the originals and I hope the stuff doesn't leak out. It was also much heavier - the original metal pockets are almost as thin as a foil, so they didn't add a lot of weight. My opinion of pocket cells as a battery construction went up a notch or two. I remixed and compacted the Mn that had fallen off the Mn with stibnite electrode made above. If my calculations above are right, it should have 6 or 7 amp-hours of juice. But the nickel electrodes I coupled it to were only 5, and I was only filling the cell half full since this electrode was half height, so it would be lucky to have three, limited by the nickel.
   The cell started with a very low voltage. The Mn was 'overdischarged' MnO2 and had to be charged first to Mn(OH)2, then to Mn metal - twice as much as a regular charge. The nickel would be bubbling O2 before the Mn would start to bubble hydrogen! The reaction MnO2 to Mn2O3 is +.15 volts. Mn2O3 to Mn(OH)2 is -.25 volts. Mn(OH)2 to Mn(0) metal powder is -1.56 - the high energy reaction. The initial voltage was around .3 or .4 V: +.49 - +.15 = .34 V. Then it would be higher voltage: +.49 - -.25 = .74 V. I figured the charge voltage would climb gradually from around .55 to .9 volts, and then climb rapidly to the 2.05 V area, as .49 - -1.56... if it worked. At 50mA charging voltage did rise over the hours from about .5 volts in late morning to .7 at bed time. At that point it would already supply a steady .55 A into a 1 Ω load.

   In the mirror I had noticed a tiny spot on my nose bleeding. It didn't look like a bug bite and wasn't inflamed. I couldn't remember anything hitting me on the nose. Hours later I looked and it was bigger. It then dawned on me that a tiny drop of potassium hydroxide must have splashed up and hit me on the nose, little tho I was using and carefully tho I'd poured it. (I did have safety glasses on.) A small drop - what nasty stuff! This is a good reminder why I want to make salt electrolyte batteries.

   The next afternoon, the cell voltage was still rising (.85v), but it didn't seem to supply current as well. I opened the cell and saw the purple color of permanganate in the water. The pH had dropped to 13 or less. The most likely scenario would seem to be that the Mn(OH)3- ion shown in the Pourbaix diagram had indeed formed, ignored the zirconium ion shield, touched the positrode, and formed KMnO4, reducing the level of KOH until the pH dropped to 13, whereat the Mn(OH)3- ion ceases to form.
   The question was whether the cell could work well like that or not. The nickel plating and then the metal underneath on the positrode pockets might well dissolve - it certainly would at pH 10 or 11 or less. This could be solved by a new cell with grafpoxy electrode structures. I hoped the cell would last at least long enough to see how the chemicals worked and if the 2.05 open circuit volts would appear and not discharge itself within minutes or a few hours.
   The nickel Pourbaix diagram shows nickel also working best at pH 8.2 to 12.6, and again this isn't indicated on the simpler charts. That would mean that except for the potential dissolving of the electrode structures, the chemicals at the lower pH should charge and discharge indefinitely. It might also mean more weakly alkaline cells would have substantially lower self-discharge than at pH 14. The current capacity for a while seemed reduced with the drop in KOH electrolyte concentration. But by late evening the cell crossed the 1 volt mark and capacity was improving - over .7 amps into a 1Ω load.
   The third day I found it would start supplying over an amp and then continually drop until it hit about .74 volts, where the voltage became steady. That should mean that the Mn was now pretty much fully charged to Mn(OH)2, -.25 volts. That would be NiOOH-Mn(OH)2 = +.49 - -.25 = .74 volts. I found it would drop to about this same voltage with either a 1Ω or 2.2Ω resistor, suggesting quite good current capacity. The initial higher voltage was presumably from the small portion charged to Mn metal. As the day went on and the voltage rose, it seemed to take longer to drop from the rising voltage to .74V - but not very long. I increased the charge to about 65mA. The pH remained around 13 and the water color slightly purple. The nickel plated positrode pockets didn't seem to be dissolving. Still no bubbles were visible - good signs!
   By three days charging about 4 amp-hours should have gone into the cell. Since the voltage was well above .75, some of the MnO2 must have passed the Mn(OH)2 state and charged to Mn metal.
So the capacity of the Mn is somewhere below 4 amp-hours. A few bubbles were seen. It was hard to tell, but I thought they were from the nickel side. Specific gravity of the electrolyte was about 1.22, so the permanganate hadn't notably diluted the KOH. The charge voltage seemed to stop rising at about 1.65 volts... surely it should get closer to 2? Notwithstanding the slight pH shift, nickel-zinc charges to 1.8, and Mn should be about 1/4 volt more.
   It then occurred to me that the perforated brass 'pocket' containing the manganese might be a problem. The brass had no overvoltage additive, and might well bubble hydrogen at that voltage. I suspected I had a good cell with a bad exterior pocket material. There's no guarantee that the original steel pockets would work at this high negative voltage, either... except that evidently they do work with zinc.
   The battery seemed to run perfectly, except at the .74 volts level instead of 2 volts. After about 10 hours discharge into 5Ω, well over an amp hour, it was still going great. Internal resistance as discerned by the voltage drops at different loads, might be estimated at around .1Ω.
   Obviously the next try should be a Mn electrode with a grafpoxy grill to eliminate the brass piece. I took the previous cell apart and used that one. The first result was quite clear: the conductivity of this electrode was crap, whereas the one in the brass cage had been excellent. It had expanded within the first cell. Conductivity is the first thing that needs to be made repeatably reliable, irrespective of chemistries.
   The second result also seemed quite clear for a while: the voltage rose about the same as the first cell, to around 1.6-1.7 volts, and started bubbling. I didn't really understand this, because zinc charges to 1.8 volts, and Sb2S3 should be a good overvoltage raiser. Even if the Mn wouldn't charge to metal or discharged too quickly to be of use, I thought it should go over 1.8 volts or so before it started bubbling.
   One idea was that the pH could be further lowered, as the Mn voltage drops from -1.56 to about -1.15 volts as pH goes from 14 to 7.5. Hydrogen voltage drops too, but not so rapidly.

   But one last thing to try first was to up the charge and let it bubble. After all, I expected that the antimony was likely to convert to keresemite, which might have a higher hydrogen overvoltage than the stibnite, so the test wasn't fully complete until a long charge has been made, to either have that happen or be sure it won't work. I dropped the series resistor from 56 to 27 ohms. The voltage went up to 1.84 (and stayed at about that level), and I found the current was only 61mA - so actually I'd only restored the charge to around its original current, at the higher voltage. (I probably should be using the lab power supply for charging instead of an old power adapter and resistors. For that I need a bigger counter space to work on.)
   In an hour it was holding higher voltages from 1.7 V down much longer, but not really stopping and stabilizing anywhere. After another hour I dropped it from 27 ohms to 10, and 115mA current. The voltage hit 1.9. In another hour it was down again to 1.82, and when disconnected dropped still more slowly from about 1.8 volts. It also stayed up longer and higher with a 10Ω load. Increasing conductivity as well as increasing voltage pretty much meant the manganese had to be charging from hydroxide to metal. In another hour the charge was back to 1.9, but it held 1.82 volts open circuit, and almost 1.75 discharging at 175mA for about a minute.
   On the 28th I disconnected it for a couple of hours. Voltage dropped to 1.38 volts and it had little energy left for discharge. I tried upping the charging current to 710mA. The charging voltage rose to over 2 volts, and it started discharging from 1.9+ with good supply. So it would charge if driven hard enough, but it had the usual rapid self discharge. But the voltage stayed higher more easily. Perhaps the keresemite was still forming. However, the boiling had partially broken up the electrode, and the water was black with manganese oxides. pH was back to 14.
   Another possible reason for high self discharge occurred to me: the Sb2S3 was simply mineral ground from a rock. It might well be that on a milli- or micro-scale, that there were 'chunks' of it in one place and other places where it was missing. The missing spots would continue to have the spontaneous self discharge, gradually dragging the whole cell down.

   I decided that in spite of considerable bubbling and self discharge, the cell probably was essentially working. The stibnite powder had arrived on the 26th, so the next step would be to make another new Mn negatrode with fine stibnite powder in it.

Envisioning a Production Battery Construction

New idea battery case with next Mn electrode installed. Separator paper goes on top.
This would be molded piece #1.
   I started imagining a number of possible molded plastic shapes, lightweight "pocket" cages with the vertical bars and perforated sides, or a grid lattice holding in paper sides, to hold the electrodes and prevent them from expanding once inserted into the cell, which appears to be my ongoing main problem. These, or perhaps even a bezel, might also make handling and inserting the electrodes simple, including for DIY production. And electrodes with internal grafpoxy coated grills - or even nickel plated grills - should be cheaper to make than nickel plated pocket cells. This construction could be applied to any fillings chosen, so it should be well worth it for somebody to set up some sort of production line to make batteries in that form without waiting for any other battery success in my research. (Making a mold(s) for this seems like a fine job for my new milling machine!)

With paper, and vertical bars glued around edges (where paper might have
a gap). Ideally bars would be a four-sided frame, taller than the electrodes
and with finer, closer spaced bars.
   On further consideration, I decided that maybe making the cases to exact 'bezel' size but leaving one side off might be the simplest. The bottom electrode, exact size separator paper, a frame of bubble path bars (glued around the edge), another separator, the top electrode, and something springy if any space remained, would all be layed gently into place without the likelihood of breaking the electrode briquettes, then the other side would be clamped on top and glued. Then it would be set upright and the top glued on. The more of the four plastic pieces that were pre-molded, the easier it would be, but it could all be glued flat pieces.

   Known reliable chemistries like nickel-iron or nickel-zinc should work without issues and provide perhaps 40-70 or 70-100 watt-hours per kilogram. If battery lids were made to screw on, with a rubber gasket, the cells could be opened and the zinc electrodes cleaned off or replaced when necessary.
   Of course nickel-manganese will be a better choice if it works - I'm optimistic that it will if done right, and that they'd get 90 to 120 WH/Kg. That's not as high as lithium ion, but it's better than lithium-iron phosphate (60) and better than NiMH dry cells (70-100). I would use the watercolor paper separators, but (borrowing from pocket electrode batteries) put in a plastic frame having about 4mm spaced vertical bars and no cross members except at the top and bottom,
between and (maybe) behind the electrodes, thus creating small liquid filled vertical spaces beside the bars, to allow bubbles to rise to the surface in the event of overcharging. In fact, that would be the only place there'd be straight liquid except to have enough over the tops of the electrodes to immerse them.

   If steel pockets work okay with manganese, present nickel-iron battery makers could simply put an Mn(OH)2+1% stibnite mix in their cells in place of the Fe3O4 - then they'd be making about 1.8-1.9 volt cells instead of 1.2 for about the same cost and with no real changes to their assembly lines. 60% more energy would yield 50 to 80 watt-hours per kilogram batteries instead of 30 to 50. That's within present electric vehicle expectations, and the current capacity with manganese seems notably higher than with iron.


http://www.TurquoiseEnergy.com
Victoria BC